A Spanish Booklet - My First Attempt at Bookbinding


Bookbinding is one of the few crafts I have yet to think of trying. That ends today. I am currently taking a Spanish Class thru Spanish Blackbelt in Hoboken NJ. I have a private tutor in a small group with another woman. The interesting part is that our 'textbook' is provided via their website. So I can print out all the chapters and do the homework- No heavy book to carry around. At first I started using a binder to hold my chapters and work, but that became very heavy to carry around with me and not as transportable. I work in NYC and I rather not have to carry a binder with me 24/7, considering I wanted to have it with me a large majority of the time to work on it.

Over time I started just using sheets of paper folded in half. However, with the amount of work I was doing, it was causing a lot of mixing up papers and losing different things. It also made it hard to keep track of everything, what I did and didn't do. I started creating a check list. It was just a print out of a table that I could fill in with the information I needed (what I did, what chapter it was from, where I did it, what was the topic and if it was complete). This worked for a while, but not as well as I would hope. I then decided to create then print a cheat sheet that listed all the chapters and all the assignments. This way I could check them off. This was difficult seeing as all the paper still was getting mixed up or lost.

Last week I finally thought of a simple (sort of) resolution. I would transform the online text into a booklet. This would be perfect, I could make it the size of a folded piece of paper. This would also be perfect because my notebooks are also the same size. On to Pinterest I went.

There seem to be several different way to create a book/booklet. The first part is to figure out your content and print.


There are multiple ways to create your content. You can leave the pages blank, or print your content on the pages like I did. The easiest way to make this type of booklet would be using MS Word.

Steps on MS Word 2013:
  1. Open a new blank document. 
  2. Go to Page Layout tab.
  3. Click the arrow on the bottom right hand side of the Page Setup box on the toolbar (this opens a new window),
  4. Change the Orientation to Landscape.
  5. Under Pages, for Multiple Pages chose Book fold. This will prompt another drop down- Sheets per booklet - choose All.
  6. You can also adjust the margins in this section as well, however you would have to chose the exact width of the margin you want. As an alternative-
    1. Close out of this window. 
    2. Go back to the Page Layout tab.
    3. Click the left most icon in the Page Setup box on the toolbar. It is labeled as Margins.
    4. Chose which margins you would like. (I chose Narrow, then manually gave myself a little more space where the inside of the page will be, using the marks on the ruler.) 
    5. ** To change your view of the document to show the ruler-
      1. Go to the View tab.
      2. In the Show box, click the box that says Ruler.
  7. Important notes:
    1. The way I set this up, all the way thru to the printing: 
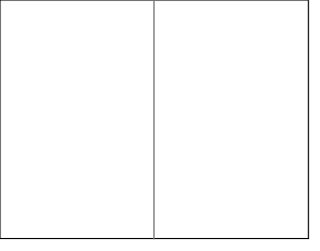
      1. The very first page of your document will be your cover (See picture on the right- first is how it will look on MS Word, the second is how it will print).
      2. The second page of your document will be the first page- the left side of the booklet (on the back of the cover-see picture on the right).
      3. The third page of your document will be the second page- the right side of the booklet.
      4. This continues- PLEASE NOTE: When printing (see next section)- it will print in a way that you can just fold the pages and they are in order. 

  8. You are now ready to start adding your content.You can create your own content in the document or insert images you want to use. In my case, I used screenshots of the PDF file provided by my tutor. For this version, I decided that I wanted all the right sides of the open book, to be for notes on that chapter. So, I inserted lines on every other page. 
  9. I separated all my chapters and made a separate section for the index/syllabus. For each of these, I created a new Word document. This way I can bind them within their chapters. 


Once you completed your content and are ready to print:
  1. Go File - Print
  2. Choose your printer and Settings:
    • Print all Pages
    • Print on Both Sides (Flip pages on short edge). 
      • You can manually print on each side but please take note about how this will print from above. 
Your booklet will print as follows (This one has a Front Cover, Back Cover and 10 Pages *the last 2- I left blank*):


  • Page 1 - Side 1- The Back Cover & Front Cover

  • Page 1 - Side 2 - Page 1 & LAST page:


  • Page 2 - Side 1 - Page 2 & Page 9

  • Page 2 - Side 2 - Page 3 & Page 4


  • Page 3 - Side 1 - Page 4 & Page 7


  • Page 3 - Side 2 - Page 5 & Page 6


For supplies, I quickly ran and found these simple things in the craft isle for less than $6.00.


In the process of learning how to bind my book, I found several tutorials that were amazing. My favorite was by James Darrow via deviantart.com. I used this tutorial combined with other materials and my several different attempts to create my book. Here is what I learned:
  1. Fold each piece individually. If you fold them as a group, they will not be consistent and be slightly off. 
  2. Create a template for punching the holes for sewing the pages together.
    • Take a scrap paper the same size as you are using and measure out the spaces where you want to make your holes. 
  3. Using another book, insert your page, then line up the template and punch holes accordingly. Using another book will allow you to make the holes in the crease where they are needed,

  • Once you finish punching your holes, reorganize your sheets in the sections you want them to be divided by.

  • At this point, I recommend following the tutorial provided by James Darrow via deviantart.com.
    • My notes for using his method:
      • He doesn't fully explain how to connect between the new sheets and the old. I just simply looped the thread around the previous sheet's loop. 
      • One of my issues with this tutorial is that it only attaches the ends to one another and the inside isn't. The result is pictured below.
                       

      • To resolve this issue, I tied a strand of lose thread to one end of the center loop. I then looped around every sheet on one end. 

      • This fully resolved the issue:


For the cover, there are several ways to go. I tried the following:

1. Using card-stock, cut out an 'inside cover'. This will be the same length as your binded sheets, but the width will be about 25% shorter on each side. Don't forget to measure the depth of your binded sheets. See diagram below.


In the image to the right, you can see a sample of the original sheets that you folded to create your pages.


In this next image, it displays a red border- this will be your new cut lines for the card-stock. It also have two pink lines- these will be your fold lines. 


To figure out how wide this inside bar will be, measure the thickness of your booklet. Divide that number in half, and then measure each side to that number.
For example, if your booklet is 1 inch thick, you measure .50 inch from the center crease.

To figure out the width of the larger width, take the size your individual pages and minus 25%. So if your individual pages are 4 inches wide, then the width of this card-stock will be only 3 inches wide on each side.

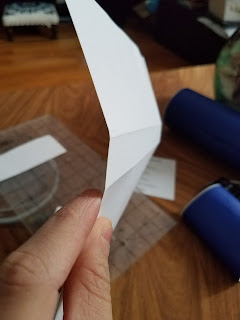


2. Using glue, (I used Fast Grab Tacky Glue) line the spine area of the cardstock. Also add glue to your thread areas on your binding sheets.
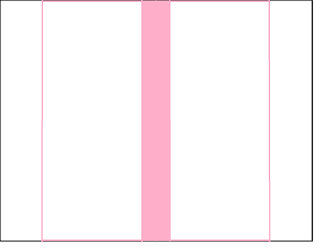


In the picture to the right, you can see the fold lines are now filled with pink. This solid bar will be the 'spine'. This is where you will add glue.


3. Glue the spine of the card-stock to the spine of your sheets. Be sure to apply pressure to the spine area.

To create the hard cover:

I reused a box made of cardboard. I was not completely thrilled with this. First off, it was not a firm as I would have liked. It also made indents and creases, which in turn, made it flimsy looking. Next time I will use 'bookboard' or the cheaper option 'chipboard.' I adapted this technique from the tutorial by James Darrow via deviantart.com. Instead of using fabric, I used adhesive vinyl.

Covering your cover:

1. To start, I measured the dimensions of the booklet. Using that info, I cut out three pieces of cardboard: A front cover, back cover and a spine. The front cover and back cover should be a few centimeters bigger than the size of an individual page. The spine should be the width as your spine above. The height should be the same as the covers.

2. I then measured out the vinyl to cover the inside part of the cardboard. I then covered each inside cover. and the inside of the spine. This was so that I wouldn't see the cardboard itself when the book is open.


3. Cut out vinyl for the cover- Now this was tricky. See diagram below.
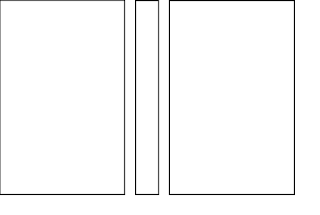
This is a simple diagram. At this point, the white space represents your hardcover (in my case, my cardboard that is shown above).

Lay out the three pieces (the covered pieces should be facing you so after this is complete, your cover will be completely covered).

Include about .25 inch between the spine and the covers.

Make sure your vinyl is wide enough to fold over the edges.

Starting by taking the backing off just half of the vinyl, then apply it to the cardboard. Make sure it is smooth and without bumps. Continue on, removing the backing as you go. This will make it easier to not get stuff on the parts you have not yet applied. Do not fold over edges just yet.
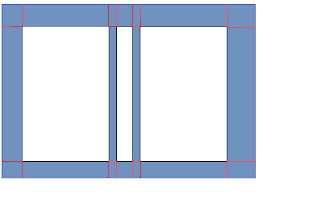


This next diagram shows where you should now cut the vinyl (shown in red).


Once you have cut these lines, your cover should resemble this image (to your right).

You can now fold over the edges onto the inside part of the cover.

 At this point, you should have a completely colored cover. You may notice that there are 2 places that you have yet to cover (displayed as light blue in the picture on the right). 

To resolve this, you can cut card-stock to cover these spaces. Or, as I did, more vinyl. 


Attaching the cover to the booklet:

  1. Lay out your cover, flat on a hard surface. Apply glue to the spine of the cover and the spine of the card-stock (that is attached to the booklet). Attach the two together while apply pressure to hold. 
  2. When it has attached, apply glue to the card-stock on the side that faces the cover. While the cover is laying flat, glue the card-stock sides to the inside covers.
  3. Using spare vinyl, cut a strip and apply (on the long side) to the ends of the card-stock that is now glued to the inside covers. This is to make it extra secure. Using a heavy object, apply pressure to the inside covers, while propping up the booklet's inside up straight (see picture below). This is to allow the glue to fully dry in the right shape.


To finish off the book, I added chapter tabs. I used simple Post-It Tabs to mark each chapter.


For the front cover design, I used my trusty Cricut. I uploaded the company's logo and created a cut file. I then used adhesive vinyl to add the front cover. I also shrunk the text and put it on the spine, along with a level number (6). 


Thoughts:

The final result was not a complete disaster, considering this was my first try. There are several things that I realized:

  • I should have used a firmer surface for the cover, rather than the cardboard. The cardboard made it look flimsy (pictured right).
    • Next time I will use 'book board' or 'chip board'. They provide a smooth surface and do not easily bend. The edges will also be smoother.
  • I hand cut my covers, which made them imperfect. I am a perfectionist, so I wasn't completely happy with them not being consistent. 
    • Next time I will look for pre-cut boards, that way they are perfect. 
  • I wanted to add a bookmark into the spine, but forgot. 
    • Next time I will use a strip of ribbon, maybe even two, while I am gluing the spine. 
  • There was a big gap (pictured right) after I glued the card-stock to the cover. I am not too sure why this happened, I am thinking there was too much space between the spine and back cover. Next time, I will try less space here
  • A lot of the supplies I used were just what I found very quickly. I think that the thread I used may have been a little thick for this project. 
    • On one side, the thick thread made it easier to bind to the cover. 
    • On the other side, since I was using normal printer paper, I felt this thread could rip the paper easily, however it didn't. 
    • I did like the wax thread, it seemed to work well for the project. 
  • The pen I used to number the tabs was not as efficient as I would have liked. It required a lot of rewriting. Next time, I will use a sharpie or just cut numbers via my Cricut. 


"Carter Beanie" - My First Attempt - Crochet

I love crocheting and trying new and challenging patterns. I love making things for other people because it is more meaningful that some thought about you, found something for you, and made it specifically for you. Now this is pretty easy to do for babies, toddlers, and women- because we all use these types of things. Now when it comes to men, that's where I usually get stuck. This time around, I wanted to make something for my amazing boyfriend, but he is quite stylish. I took a long time to find a pattern for a hat I think he would actually wear. After countless hours, I found this "Carter Beanie" by Alana Harley for $5.50. I actually did a full search of Etsy to find something like this. The photo provided for this pattern is of a young boy, but the pattern has the options for 5 sizes: Infant (6-12mos), Toddler (1-3yrs), Child (4 -11yrs), Adult (teen and womens) and Large Adult. The pattern also has a large pom pom on top but I excluded this portion of the pattern- my preference. You can find the pattern for sale via her Ravelry Account or Esty Account.

Anabel Turns One - My First Attempt at Quilling


As I've said many times over, I go to Pinterest for inspirations. Within the many depths of this amazing platform I found the paper art of Quilling. For those of you who are unfamiliar, this is the art of taking thin strips of paper and standing the straight to form a design. When I first saw this, I was amazed. For me, that means I need to learn how to do it. It took countless hours, that I actually had at that time. Below you can see the phases of my work, from sketching the design to actually implementing it and finishing the job.

Quilling Overload - Ways to Improve

How do we improve? - I hate to admit it but my mom was right- Practice!  Practice! Practice!

I am someone who never liked to practice when I wasn't interested in what I was practicing with. Practicing piano by doing scales? Mary had a little lamb? Hell no! Crafting is the same. It should be fun! Sure Start with the basics and work your way up- I tend to figure out how to do the basics then tinker around myself. I try everything and play around with everything.

Everything I learned, I learned from blogs, articles and tutorials that I found on Pinterest and all for free. I did invest in some books (because I am a nerd.) All of them gave me the same info I found online. Save your money. These books would be good if you are looking to do those specific things in those books. However, I have my own ideas. I use all these sources to create my projects.

It takes time to get the hang out of. And I will tell you right now- you will never think your work is perfect. EVER. After I finished my niece's gift, I criticized it until the day I wrapped it (that morning). My mother and sister thought it was FLAWLESS and all I could see were those minor details that I wish were more perfected. Nobody have ever noticed not one of those 'imperfections.'

Some simple tips:

"Fluffy Meringue Blanket" by Patons

This project was a time consuming one and one of my favorites. I made this for one of my friends who was expecting a baby girl. It is actually a FREE pattern by Patons. You can find it here on Yarnspirations.com. It calls for Patons North American Beehive Baby Fingering Yarn (Affiliate) in the color 'Vintage Lace'. I seriously looked hard for an alternative but nothing made this blanket as fluffy as it should have been. I did end up giving in and ordering the 6-pack bulk buy from Amazon and has 4 color options. I was not able to find it in any stores. After the first few rounds, I was extremely happy I bought the recommended yarn. 
I absolutely love this blanket! I have never made one anything like it. I even love the pattern on the back. It does take a bit of time, or seems that way.

My Attempt with Joana's Mandala


Finding 'Joana's Mandala' has been the highlight of my week. It is such an interesting pattern and a challenging one at that. The pattern was created by Tatsiana Kupryianchyk (LillaBjörnCrochet Design). It is for sale on Ravelry for $5.50. She also offers an additional pattern/border to make this even bigger. This post will be for the main mandala. I will have a separate post for the addition. 

I absolutely love this artist's patterns. Check out her website: http://www.lillabjorncrochet.com/. If you sign up for her Newsletter, they send you a Free Macaron Pin Cushion- all you need to is confirm thru email.

Gluten Free Lactose Free Low FODMAP Banana Walnut Bread, oh my

Some may say baking is a craft. So this counts ;)
Several months ago my boyfriend (who has been type 1 diabetic since the age of 1) found out he has a slight gluten sensitivity. To give you an idea about what my boyfriend is like, when his doctor told him of the sensitivity, he told the doctor that it can not be true because, "I'm not a hipster."
Now I LOVE bread. I eat bread with every meal. Especially after find out my first love, cheese, well turns out I'm lactose intolerant. And to make it more complex, we found these two things out weeks before a planned trip to Paris. Fabulous.
Fortunately he is able to eat gluten, he just gets bloated. We do try to eat gluten free when possible. The one thing he missed though, was banana walnut bread. So my mission began.
I did a lot of research (again-nerd) and off to Pinterest.

Kick Start Your Quilling - A Guide to Supplies and Tools


Flashback 2 years- as my niece's first birthday approached, I wanted to make her something unique and personal that she could treasure. I then went back to my original Creative Pinterest board for inspiration. Within, I found the world of quilling. It was fascinating and challenging and I had unlimited time (I was working freelance at the time.)

I started as I usually do, creating a new board and started searching all corners of the Web. Here's the results:


A Crafter's Essentials - My Tool Box


I am one of those people that goes to craft stores and just wanders all the isles- looking for inspiration, ideas, and maybe some things I could use. If you haven't guessed it, I come from a house of crafting. My mother was an avid crafter when I was a kid, as she still is today. Back in the day, she made school projects fun and Halloween inventive. Every single one of my Halloween costumes was handmade and it started as a teeny tiny idea. I was a 'run away hospital patient,' and The Statue of Liberty (everything matched green- even my skin) to name a few. Once my sister won a 'Crazy Easter Bonnet Contest' in which my mother used a full sized hula hoop as the rim- I will have to find a picture, I made the newspapers, LOL. The only change since my childhood, is that now, she has me who is just as crafty and encourages her craziness. We bounce ideas off of each other everyday. Which leads me to the whole point of this post- One sunny day we went for a stroll through Michael's as usual and we had nothing specific to buy so we just strolled and chatted. I could not believe the things that she didn't have, that I use EVERY DAY- things that were My Essentials. So here- I share my tool box.

One note- I do A LOT of different types of crafts. I shall explain.


    • If you are EVER cutting anything with an exacto knife or a rotating blade- this is a MUST NEED. This will allow you to apply as much pressure as you would like, need or accidentally use.
    • If you craft with glue- this protects your work space and makes it easier to apply to your projects.
    • Hot glue gun? Definitely need this. You have no clue how many times I've gotten hot glue places that it is impossible to remove. I have melted countless things. I mean c'mon- who hasn't? This will make it okay- or at least allow you to hide it from your significant other or roommate. No- this is one not heatproof- it is just there to protect your surfaces. You can buy heat resistant ones if you will need that frequently.
    • You need measurements frequently? Solves that issue too. There is a measurement grid with angles.
    • I am sure I will come up with more reasons why this is essential- but you get the picture.
    • Check out this Fiskars 12x18 Cutting Mat from Amazon for $13.99. You can find better quality and different sizes on Amazon, Michael's Craft Store and more. There are also self-healing ones as well as heat resistant like this Fiskars Heat Resistant Silicone Craft Mat from Amazon for $21.99.

    • This has been amazing. I have this one (right). I love that it is clear/frosted so I can I line up what I am measuring exactly. It is durable plastic and I have beaten mine to hell, but use it everyday.
    • Cutting paper? Just line up this board and cut along the edge= perfection.
    • Cutting fabric? Quilting? Same thing - perfection.
    • This really is perfect when using an x-acto knife or rotating blade- just cut alone the edge.
    • Take a look at OFLA 6x12inch Frosted Ruler from Aamzon for $10.07. You can get the exact same one at Michael's for $15.99.
    • I was very hesitant with this purchase- I am not a fan of very sharp blades. I do use this very frequently. I originally bought it when I started Paper Quilling for precise cutting in small and narrow spaces. Also it is great for positioning the small pieces very close together. You will need a blade as thin as the paper- this will do it.
    • The blade is so thin and the point is perfect, this will be more handy than you think.
    • Any paper craft? This is a must hand. It will give you more freedom than you can imagine.
    • Using duct tape to craft? Overused your glue and need to trim some off? Precision right here.
    • I bought mine from Michael's years ago. Similar to this one on Amazon with a Safety Cap for $5.90. There are probably cheaper options. Mine did not come with a safety cap, so now I tape the blade when I am storing it.
    • This tool is essential for certain crafts- not all.
    • It is vital with fabrics. I had a bad habit of not cutting straight or smooth lines with scissors.
    • When used with the Ruler Board (above)- it makes cutting fabrics a cinch.
    • When cutting paper or scrapbooking- this works great.
    • You can check out this Straight Handle Rotary Cutter from Amazon for $9.54 (you can buy the exact same one at Michael's for $15.99.) 
    • You can buy different sizes. Mine is the smallest option. This one has a sliding blade protector, but there are also ones with automatic blade covers.
 
    • I originally bought this when I started Quilling to make my own Quilling paper but my own paper was not as effective as paper created specifically for this purpose (see this post on that info).
    • I now use this so much that I keep extra blades in my toolbox (although I have never needed one just out of the blue- only replaced it once or twice in several years).
    • Cutting paper? No questions about it- this is essential. Straight lines guaranteed every time. Works with different paper weights including card-stock.
    • Do you have a cricut or silhouette cutting machine? One of my struggles was trimming the vinyl that comes in a roll. This slicing board makes cutting vinyl or other materials used in those machines.
    • Trimming edges? Do I need to say more?
    • I also should mention that all your cuts will be perfectly measured every time seeing as there is a ruler on the mat.
    • Check out this 12 Inch Fiskars Portable Scrapbooking Trimmer from Amazon for $14.99 or a very similar 12 Inch Fiskars Recycled SureCut Trimmer in Black for $10.78.

    • Not kidding you, I misplace scissors like it's my job. I highly recommend not buying cheap-o scissors. They will probably not cut smoothly or will wear out or break easy. What I recommend, every time you are in a craft store or section, look for good quality scissors on sale and stock up while they are cheap.
    • You need scissors for every craft project- Yarn, paper, cardstock, Quilling, quilting and so on.
    • One recommendation I see frequently is to have designated scissor for each material- I've tried this but as I said, I lose scissors like it's my job. So that never worked for me. The time I had with using the same scissors for different materials is only when I use a cheap pair of scissors. 
    • In all seriousness- invest in at least one good pair.
    • These Fiskars Non-stick Titanium Softgrip Scissors on Amazon (below) have been amazing for me. I have used these for most of my crafts in the past several years. I have the 5 inch ones, which are $6.97 and for the 8 inch- $7.97 on Amazon. I bought them at Michael's but it seems they are so much cheaper on Amazon.
 
    • Yup- you'd be surprised. I use a cheap pair that came in a manicure kit that I got at the drug store.
    • Anything small? Beads, Quilling paper, scrapbooking, so on and so on.


    • Clear, aluminum, 6inch, 12inch, any really- I usually have a few throughout my house because you never know when you will need a straight edge or a quick measurement.

 
    • My tool box changes depending on what craft I am working on. My big items, like my cutting mat and ruler board are always on my work station. My slicing board is next to or under the table I am using. Sometimes it's my desk, other times it's my coffee table. All my smaller items I move into different boxes/containers depending on the craft, that way I have easy access to all my supplies.
    • This week it a utensil holder for your kitchen spoons. It works this week because I am working on hand journaling and using a lot of pens- makes everything easy to grab.
    • Last week, my tool box was a small bin- I was making a wind catcher. The open top was great because I could see all my supplies, like all my different threads and beads. I also had the smallest rubbermaid container to put beads that I was using- it made it easier to pick and take than the small tube they came in.
    • A good guide:
      • Make sure everything is easily accessible- so one that has an open top or removable lid. 
      • Portable but sturdy- you want to be able to take it to wherever you craft, but you don't want something that is flimsy and can break/collapse. 
      • Try HomeGoods- that is always my go-to for things like this. You can find all sorts of things that would work great as your tool box.
    • Other things I use all the time no matter the project:
      • Cups/pen holders- I love to find pretty mugs and use them to store my pens, markers, scissors, msc.
      • I use a computer desk (without a desktop computer), so I have an empty keyboard tray. I use this Organizer Tray (for your Scrapbooking Case) on the keyboard tray. I bought it for cheaper at Michael's 2 years ago. I love this tray because it has movable dividers and it is meant for your 12x12 scrapbooking paper case that you find at the craft store, so when I need to move it, it's very easy and secure. 
    • And lastly -It is what you make it-.


Balloon Ceiling Birthday Surprise


Last year, my cousin went all out for my birthday. She decorated my room without me knowing and popped confetti bombs at midnight. Her birthday was a month later, Dec. 20th. I wanted to go all out- so off to Pinterest again! I found an awesome idea! A Balloon Ceiling!!!! It was going to be a challenge seeing as we were roommates at the time and she was going to be home. The plan was to line the hallway outside of her room.


Give yourself some time to figure out the best options. It took me about a week to plan and complete (please note that I was working 45+ hours that week, so it took longer than you probably could). The night of, it took about 5-6 hours to complete the project with me and another person.

1. Helium Tank-
I looked for a decent priced helium tank. Any tank you could buy just outright were going to be expensive for the amount of balloons I needed. So I turned to rentals and found a party store (Party Fair) an hour away with good prices. I got a medium tank to be sure not to run out- we definitely had enough. The rental was per day, so plan around when you can pick up and drop off.

2. Balloons- 
I ended up just buying balloons at Party Fair as well since I was already there. I chose 3 different colors in 12 inch latex. I bought a package of 72 each. Be careful with the type of balloons you want to use. Make sure to check how long they stay inflated. Regular latex balloons usually deflate within 18-24 hours.

3. Curling Ribbon-
I usually have rolls of curling ribbon handy (similar to: these on Amazon). I didn't use more than half. I also had scissors on hand but did not use them. The length of the ribbon was long enough that it kept its natural spiral. You can buy cheap rolls of curling ribbon in a lot of stores including Walmart.

4.Extras
9" Foil Paper Stars, Silver, 5pkBeing the crafty person I am, I went to Walmart's craft section and looked for extra stuff to bring this project to the next level. I ended up with matching confetti, Happy Birthday signs, some streamers, and star shaped cardboard cutouts (picture to the right) to dangle from the ribbons. These were great because they had pre-punched holes and came in different sizes and colors. See Foil Paper Stars (Silver-5pk) from Walmart.

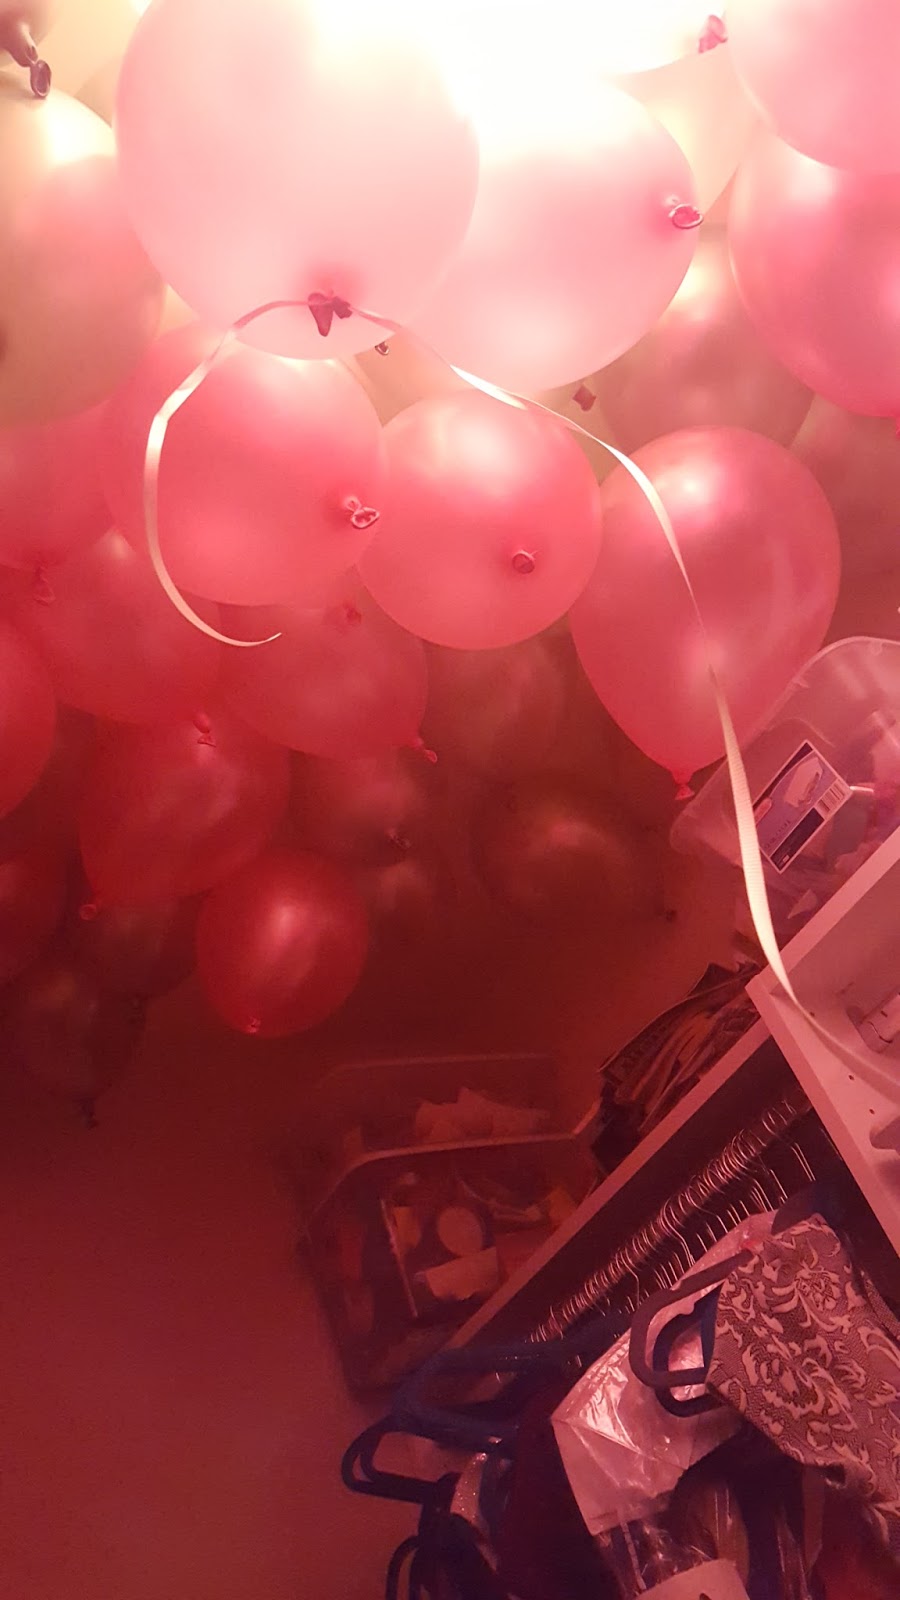
I originally wanted to inflate the balloons a day or two in advance and hide them in my walk-in closet. I am glad I didn't because as I said above, latex balloons deflate and wilt within 18-24 hours. Make sure to plan accordingly to workaround this, or look into other types of balloons. 


I did not think this was completely through ahead of time. At first I wanted to just fill them in my garage however there were two issues. First- the ceilings were extremely high, making it difficult to grab them. Second- thankfully my helper made a good note- helium tanks make a lot of noise and our garage was directly under her bedroom. As a precaution, we decided to inflate them in the farthest corner from her room on the same floor, which ended up to be my walk in closet. We slowly moved the completed ones into my bedroom until will had finished. Since most had ribbons already, moving them into the hallway was extremely easy.


Ask for help! I asked several people who agreed but then at the last minute didn't. I thankfully had one of my cousins helping me. If it were just me, it wouldn't have happened. Blowing up balloons is a long and tiring process. We were able to switch off tasks so we didn't wear ourselves out completely. One of us inflated the balloons and the other tied the knots. It would have been nice and quicker if we had an additional person to tie the ribbons too. If you are planning on doing a larger space, definitely look into getting more than one tank and a bunch more of people.


1. Tie the ribbon to the balloon after you put the knot.
After my cousin inflated about 25, I realized we should have been tying the ribbon to the knots as they were being inflated. Although he was tall enough to reach them, it became difficult with the amount of balloons we had. The 20-30 that did not have ribbon, were very difficult to move- we ended up using a broom and almost hit the fire sprinklers on the ceiling. Learn from my mistakes- tie the ribbon as you make the knots. It made it so easy to grab a handful of 50-60 balloons at once.

2. Cut ribbon ahead of time and you don't have to worry about exact length.
I made the ribbon all different lengths so it would be a mix when you walked through it. If you do all the same length, I would think it would be to uniform and flat.

3. Move the balloons to the final spot before adding extras.

After we filled the hallway with all the balloons, we went through and hung the star cutouts by the ribbon falling from the balloons. I scattered them around-not too many. The added bonus to the stars- as the day went on and the balloons started to deflate, they acted as anchors for a few (picture to the right.) We then hung the Happy Birthday banner right by her door and threw confetti everywhere. *NOTE* Confetti is very difficult to clean up*

4. Be ready for the cleanup.
Something I didn't expect was the next night when I got back home, 95% of the balloon were deflating and now lined the floor. With the amount of balloons we had, it became a hazard, especially with all of the ribbon. There were so many that the whole hallway floor was covered and some were flowing down the stairs. It only took 10-15 mins to clean up. I only mention it to prevent the hazard I created for myself.

It took the two of us roughly 5-6 hours to finish the whole project. When complete, the entire ceiling had 3-4 layers on balloons. With the ceiling lights, the light shined through and gave the whole place a fun pinkish tint.


A Toy Story Birthday - Jumping Monkeys

This project was part of a series of ideas for my niece's Toy Story birthday party. To see my original ideas and how they ...